
Breathing new life into a dingy, well-loved area rug can feel like a job reserved for the pros, but you can accomplish a lot at home with the right game plan. This guide is designed to walk you through a true deep clean, turning what seems like a massive chore into a completely manageable project.
We will cover everything from the crucial first steps of inspection and prep to the specific cleaning methods that work best for wool versus synthetic fibers.
A Realistic Guide to Deep Cleaning Your Rug
Knowing how to properly deep clean your area rugs is a game-changer. It puts you in control of keeping your home looking and feeling fresh. A clean rug does not just tie a room together; it acts as a filter, trapping dust and allergens. Regular vacuuming is a must, but it can only do so much. A deep clean is what pulls out the stubborn, embedded grime that builds up over time.
This is not just about scrubbing away a spill. A successful deep clean requires a bit of detective work. You need to understand what your rug is made of, because a technique that works wonders on a tough synthetic rug could spell disaster for a delicate wool or silk one.
Why Proper Rug Care Really Matters
Taking care of your rugs is a direct investment in your home. It is no surprise that professional rug cleaning is a booming industry, as people know their rugs are valuable assets. The demand for residential area rug cleaning is on the rise, thanks to a bigger focus on home decor and overall household hygiene. You can see some interesting data on this cleaning industry trend for yourself.
To get this right, you need a clear roadmap. We have broken down the entire process into a simple checklist to give you an overview before we dive into the details.
At-a-Glance Deep Cleaning Checklist
This table offers a quick summary of the essential stages for deep cleaning your area rug at home. Think of it as a high-level roadmap for the detailed steps we are about to cover.
| Stage | Key Action | Objective |
|---|---|---|
| 1. Prep & Inspect | Thoroughly inspect the rug, test for colorfastness, and remove all loose dirt. | Identify potential issues and remove dry soil before adding moisture. |
| 2. Clean & Treat | Apply a fiber-safe cleaning solution and gently work it into the pile. | Break down and lift embedded dirt and stains from the rug fibers. |
| 3. Rinse & Extract | Carefully rinse out all cleaning solution and extract as much water as possible. | Remove all residue to prevent stickiness and speed up drying. |
| 4. Dry & Finish | Ensure complete and even drying, then groom the pile. | Prevent mold, mildew, and odors while restoring the rug's original texture. |
By following these fundamental stages, you can dramatically improve your rug's appearance and freshness.
Of course, it is just as important to know your limits. If you are dealing with a valuable antique, a fragile family heirloom, or a rug with extreme soiling, calling a professional is always the smartest and safest move.
At Rubber Ducky Rugs, we handle the tough cases with specialized, fiber-safe washing for homeowners all across the country. With local service in cities from New York to Los Angeles, we are here to provide the expert care your most treasured rugs need. When your best efforts are not enough, our team of trained rug specialists is ready to step in.
Getting Started: Prep Work is Non-Negotiable
Before a single drop of cleaning solution touches your rug, there is critical prep work to do. Many people get impatient and jump right into washing, only to end up with bleeding dyes or a rug that looks even dirtier than before. Think of this initial stage as laying the foundation. Get this right, and the rest of the process becomes much smoother and safer for your rug.
First, get your rug to a clean, flat, well-lit area. This could be your garage, a patio on a nice day, or even a section of your kitchen floor you have just mopped. You need space to spread it out completely so you can see exactly what you are dealing with.
Give Your Rug a Thorough Inspection
Now, play detective. Get down on your hands and knees and really look at the rug. You are searching for clues that will guide your entire cleaning plan.
Here is what we check for:
- Faint, old stains: Are there any ghost-like marks you do not notice from a distance? These will need special attention.
- Fraying or damage: Look at the edges and corners. Any loose threads or worn spots are delicate areas you will need to treat gently.
- The backing: Flip it over. Is the backing dry, cracked, or crumbling? If so, a full wet wash might be too aggressive for it.
- Pest evidence: It is rare, but look for tiny, irregular holes or bald patches, which can be signs of moths.
Taking a mental note of these things helps you tailor your approach and ensures you do not accidentally make existing issues worse.
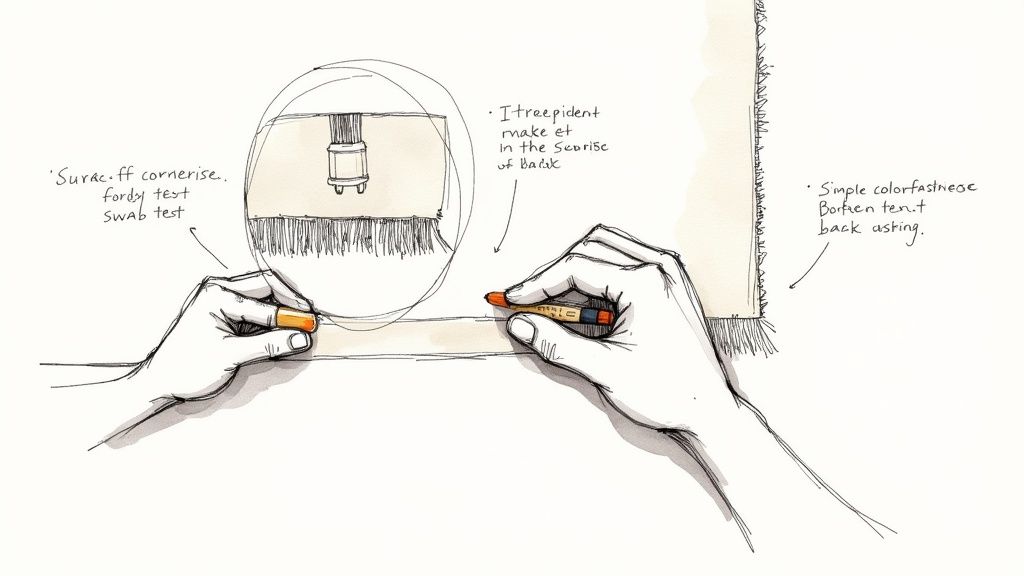
The Make-or-Break Colorfastness Test
If you skip every other piece of advice, please do not skip this one. This simple test tells you if your rug's dyes will bleed when they get wet. Forgetting this step is how a beautiful, crisp pattern turns into a muddy disaster. It is especially crucial for vibrant, natural-fiber, or handmade rugs.
Here is how you do it properly:
- Pick a small, hidden spot on the rug, a corner that lives under the sofa is perfect.
- Mix up a tiny bit of the cleaning solution you plan to use.
- Dab it onto a clean, white cloth, like an old t-shirt or a microfiber towel.
- Press the damp cloth onto that hidden spot and hold it there for about 30 seconds. Do not rub or scrub.
- Lift the cloth and look at it. Is there any color on it?
If you see even the faintest smear of dye on that white cloth, stop. Your rug is not colorfast. A DIY wet clean will ruin it. This is your cue to call a professional who has the right tools for handling delicate dyes.
Get the Dry Dirt Out First
Here is a fact that surprises most people: up to 80% of the grime in your rug is just dry, loose dirt. If you add water to that, you are not cleaning, you are making mud. The goal is to get as much of that dry soil out as possible before you introduce any liquid.
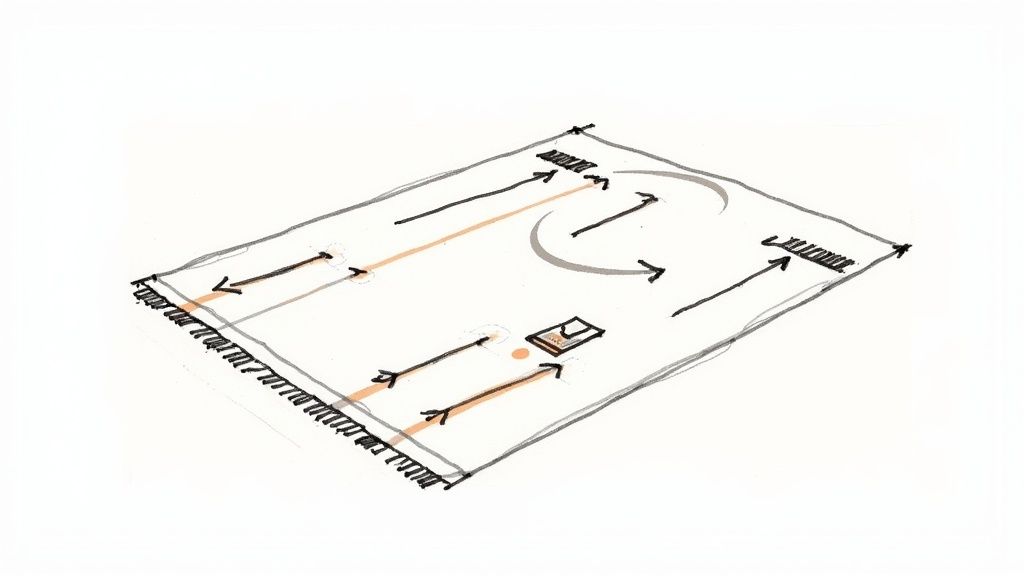
Start by giving the top of the rug a really good vacuuming. Do not just do one quick pass. Go over it slowly from multiple directions (north-south, then east-west) to agitate the fibers from all angles.
Now for the pro-tip that makes all the difference: flip the rug completely over and vacuum the back. The vibrations on the rug's foundation will shake loose all the deeply embedded grit that your vacuum could never reach from the top. You will probably see a shocking amount of dust and sand appear on the floor underneath.
Flip the rug back to the front one last time and vacuum up all the dirt that just got knocked loose. This three-step vacuuming process is leagues more effective than just skimming the surface.
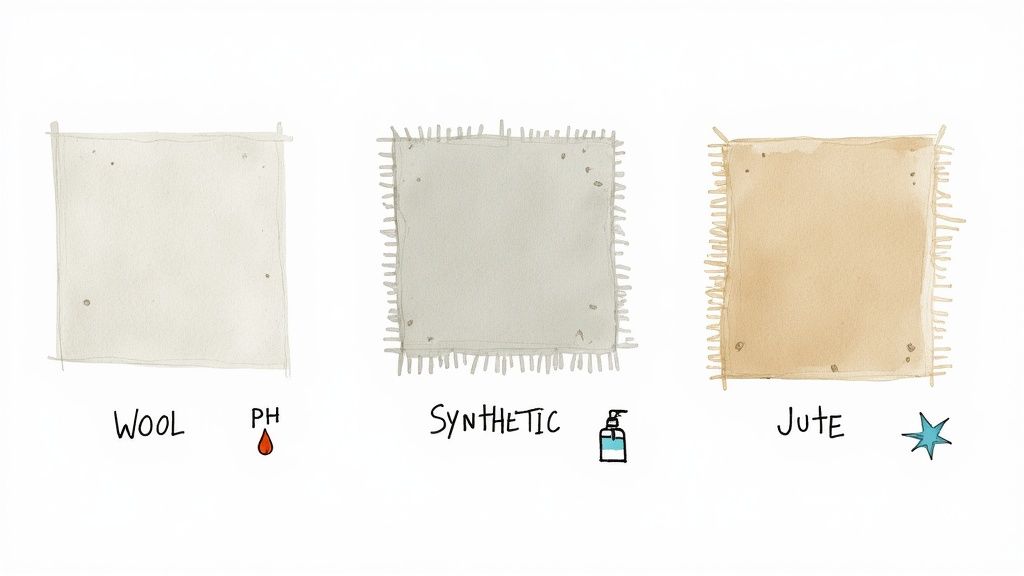
4. Match the Cleaning Method to Your Rug Fiber
This is the moment of truth. You would not wash a silk shirt the same way you wash denim jeans, and the same logic absolutely applies to your rugs. A method that works wonders on a tough synthetic rug could be a complete disaster for delicate natural fibers.
Where do most DIY deep cleans go wrong? Right here. People often grab a generic cleaner without realizing it could strip the natural protective oils from a wool rug or make the dyes in a cotton one bleed everywhere. Understanding what your rug is made of is the single most important part of this whole process.
And it is an important asset to protect. The global rug market hit an estimated USD 51.7 billion in 2024, which shows just how much we invest in these pieces. Proper maintenance is key to protecting that investment.
Tackling Durable Synthetic Rugs (Nylon, Polypropylene)
Rugs made from synthetic fibers like nylon, polypropylene (olefin), or polyester are the workhorses of the modern home. They are built for durability and stain resistance, which is great news for us, it means you can use a more robust cleaning method without much fear.
These non-porous fibers do not absorb spills as quickly, giving you a better chance to clean up messes. Their main weakness, however, is a tendency to attract oil-based soils, which can make them look dingy over time. A slightly alkaline solution is your best bet for breaking down that kind of grime.
For a simple DIY solution: Mix one teaspoon of a clear, mild dish soap with about four cups of warm water. Use a soft-bristled brush to gently work the suds into the pile, tackling one small section at a time. Just be careful not to completely soak the rug; too much water in the backing can lead to mildew.
Gently Cleaning Natural Wool Rugs
Wool rugs are treasured for their incredible softness, resilience, and the natural lanolin that acts as a built-in stain protector. Your goal here is to get rid of the dirt without stripping away those essential oils. Harsh, high-pH cleaners are the enemy, they will leave wool fibers brittle, dull, and damaged.
The key is a gentle touch and a pH-neutral solution. Aggressive scrubbing will only damage the delicate fibers and cause them to fuzz up or "felt." Patience is your best friend when working with wool.
For a wool-safe wash: Combine just a few drops of a pH-neutral soap (like a dedicated wool wash) with four cups of lukewarm water. Never use hot water, as it can shrink the wool. Dip a clean sponge in, wring it out until it is just damp, and blot the soiled areas. Do not scrub.
A well-cared-for wool rug can last for generations, becoming a true family heirloom. Rushing the job or using the wrong products is the fastest way to ruin it. Always be gentle with these beautiful pieces.
Caring for Delicate Plant-Based Fibers (Jute, Sisal)
Jute, sisal, and seagrass rugs bring a beautiful, earthy texture to a room, but they are notoriously sensitive to moisture. These plant fibers are like sponges, they will soak up water and can easily develop ugly brown water stains. Worse, prolonged dampness can lead to mold and cause the fibers to weaken and rot.
For this reason, a full "wet wash" is almost always a bad idea for these rugs. Your best bet is a dry or minimal-moisture cleaning method that lifts surface dirt without letting liquid soak in.
Try a dry cleaning approach:
- Sprinkle a dry rug cleaning powder designed for natural fibers generously over the surface.
- Use a soft brush to gently work it into the pile.
- Let it sit for at least an hour to absorb oils and soil.
- Finally, vacuum the rug thoroughly to suck up all the powder and the grime it trapped.
This method freshens up the rug without the risks that come with water. While some guides might suggest using other tools, you have to understand the immense risk involved. For more context, check out our detailed guide on steam cleaning different area rugs.
Choosing the right cleaning recipe and technique is not just another step; it is the very core of doing this safely and effectively. Below is a quick-reference table to help you match a DIY solution to your rug's specific fiber type.
DIY Rug Cleaning Solutions by Fiber Type
This table breaks down safe and effective DIY cleaning solutions for the most common rug materials. Always remember to perform a colorfastness test in an inconspicuous area before applying any solution to the entire rug.
| Rug Fiber Type | Safe Cleaning Solution Recipe | Key Precaution |
|---|---|---|
| Synthetic (Nylon, Polyester, Polypropylene) | 1 tsp. clear dish soap + 4 cups warm water. For tough spots, add 1/4 cup white vinegar. | Avoid over-saturating the backing. These fibers clean easily but can trap moisture underneath. |
| Wool | A few drops of pH-neutral soap (or wool-safe detergent) + 4 cups lukewarm water. | Never use hot water or alkaline cleaners. Blot, do not scrub. |
| Cotton & Chenille | Same as synthetic (dish soap + water). Handles moisture better but dyes can be unstable. | Colorfastness testing is critical. These rugs are prone to dye bleeding. |
| Jute, Sisal, & Seagrass | No wet cleaning. Use a dry-cleaning powder or a solution of equal parts white vinegar and water, spritzed very lightly and blotted immediately. | Moisture is the enemy. It will cause browning and fiber damage. Dry methods are always safer. |
| Viscose, Rayon, & Silk | Professional cleaning is strongly recommended. These fibers are extremely delicate and water-sensitive. | DIY cleaning is very risky. Water can cause permanent texture damage, yellowing, and shrinkage. |
Using a recipe tailored to your rug’s specific needs will protect its fibers, color, and texture, ensuring it looks its best for years to come.
Tackling Tough Stains and Odors
Even after a thorough deep clean, some set-in stains and lingering smells can feel like a final, unbeatable challenge. These problem spots demand a more focused strategy than a general wash. The secret is patience and precision; your goal is to lift the stain, not to scrub it into oblivion.
Resist the urge to scrub. It is one of the quickest ways to permanently damage rug fibers, causing them to fray and look fuzzy. The right way is to always blot, not rub. This simple technique pulls the stain up and out of the pile, whereas rubbing just grinds it deeper and spreads it further.
Dealing with Common Household Spills
Life happens, and spills are inevitable. But a little red wine, coffee, or ink does not have to become a permanent fixture on your rug. Acting quickly and correctly is your best defense.
When a liquid spill occurs, your immediate priority is absorption.
- First, grab a clean, white, absorbent cloth and press down firmly on the spill.
- Lift the cloth, find a clean section, and press down again.
- Keep blotting this way until the cloth is not picking up any more moisture.
Only after you have blotted up as much of the liquid as possible should you start treating what is left. Apply a cleaner that is safe for your rug's fibers, and always work from the outside edge of the stain inward to keep it from getting bigger.
The Special Challenge of Pet Urine
Pet accidents are in a class of their own. This is not just a simple stain; it is a complex problem that can cause lasting damage and a persistent odor if you do not treat it properly. That distinct smell is caused by uric acid crystals, which do not dissolve in water and get left behind long after the visible spot has faded.
Ever notice that pet smell seems worse on humid days? That is because those uric acid crystals reactivate with moisture. Your standard cleaner will not break these crystals down, which means the smell is guaranteed to return.
To truly get rid of pet urine odor, you absolutely need an enzymatic cleaner. These products are formulated with special enzymes that literally digest the uric acid, breaking it down at the source and eliminating the smell for good.
Simply cleaning the surface of a pet stain is never enough. The urine soaks deep into the rug fibers and even into the backing. To be effective, your cleaning solution must penetrate just as deeply to neutralize the odor-causing crystals at their source.
A Step-by-Step Plan for Pet Accidents
Whether you find a fresh accident or an old, forgotten one, following a specific process will give you the best shot at success. This ensures you are tackling both the visible stain and the invisible odor-causing culprits.
For a Fresh Accident:
- Blot, Blot, Blot: Use a thick stack of paper towels or an old cloth to soak up as much urine as you can. Stand on the towels to really apply pressure and draw liquid up from the rug's backing.
- Give It a Light Rinse: Dampen a sponge with cool water and gently blot the area. This helps dilute any urine left in the fibers. Then, blot this moisture up completely with fresh, dry towels.
- Bring in the Enzymes: Generously apply a high-quality enzymatic cleaner, making sure to saturate an area slightly larger than the visible spot.
- Let It Work: Give the cleaner time to do its job. Check the product label for the recommended dwell time and let it sit.
- Final Blot: Once the time is up, blot away the excess cleaner and let the spot air dry completely.
For an Old, Set-in Stain:
- Rehydrate and Treat: An old stain needs to be "woken up." Lightly mist the area with water to rehydrate the uric acid crystals, then apply your enzymatic cleaner.
- Cover and Wait: Place a damp towel over the treated spot. This keeps the enzymes active longer, giving them more time to break down stubborn, older crystals. You may need to let this sit for up to 24 hours.
- Rinse and Dry: Remove the towel. Gently blot the area with a water-dampened sponge, then blot it dry with clean towels.
Understanding the hidden life inside your rug helps explain why these deep-seated problems are so tough to solve with surface cleaning. Sometimes, even with the best DIY efforts, stubborn stains and odors need a professional touch. Rubber Ducky Rugs serves customers throughout the United States, with local experts in cities from Chicago to San Diego who are ready to tackle the toughest pet stains and restore your rug's freshness.
The Crucial Final Steps: Rinsing and Drying Your Rug
Getting the dirt out is only half the battle. How you rinse and dry your rug is just as important. This is where many DIY projects go sideways, leaving you with a rug that feels stiff, looks dull, or starts to smell musty from mildew.
Proper rinsing and drying are what separate a good-enough clean from a truly professional result.
The whole point of rinsing is to get every last bit of cleaning solution out of the fibers. Any soap you leave behind acts like a magnet for new dirt, meaning your hard work will be undone in no time. If your "clean" rug feels crunchy underfoot, that is a sure sign of leftover residue.
How to Rinse Your Rug the Right Way
After you have worked your cleaning solution through the fibers, it is time to flush it all out. The best tool for the job is usually a garden hose with a spray nozzle, done on a clean, sloped surface like a driveway or patio.
Start at one end and work your way to the other, always rinsing in the direction of the pile. As you spray, use your hands or a clean floor squeegee to gently push the suds and water out of the rug.
You need to keep going until the water running off the rug is completely clear. No more bubbles, no more cloudiness. This will probably take longer than you expect, but do not rush it. Your patience here will pay off.
Leaving soap in the fibers is the single most common mistake. It does not just make the rug stiff and attract dirt; it can also irritate skin. When you think you are done rinsing, do it one more time.
Getting the Excess Water Out
A freshly rinsed rug is incredibly heavy. The next critical step is to remove as much of that water as you can. This will dramatically cut down on drying time and is your best defense against mold and mildew.
A wet/dry shop vacuum is your best friend here. Go over the entire rug slowly on the suction-only setting, pulling as much water from the fibers as possible. You will be amazed at how much liquid comes out.
No shop vac? You can use a floor squeegee to push the water out or even roll the rug up tightly with several old, absorbent towels to soak up the moisture.
Mastering the Art of Drying
Proper drying boils down to one simple word: airflow. You need air circulating on all sides of the rug to get it to dry evenly and efficiently. Never leave a wet rug lying flat on the floor or bunched up.
Here is how to set up for success:
- Get it Elevated: Drape the rug over a few sturdy patio chairs, a pair of sawhorses, or a clean railing. The key is to let air reach both the front and the back.
- Create a Breeze: Position a few fans to blow air across the rug's surfaces. This is especially important if you are drying it indoors or in a garage. A dehumidifier running in the same room is also a huge help.
- Flip and Rotate: Every few hours, change the rug's position or flip it over. This ensures every part gets exposed to the moving air and prevents any one spot from staying damp for too long.
A rug can feel dry to the touch on top while the backing is still holding moisture. To check, press your hand firmly into a thick part of the pile. If you feel any hint of coolness or dampness, it needs more time. Your goal is a rug that is 100% bone-dry.
Once it is finally dry, give it one last vacuuming. This will help lift the pile and restore that soft, fluffy texture. Now you can move your beautifully refreshed rug back into place.
While these steps work wonders, some rugs are best left to the pros. For delicate or heavily soiled pieces, Rubber Ducky Rugs offers professional deep rug cleaning for homeowners in cities from Houston to Miami, delivering expert care for a perfect finish.
When It's Time to Call in the Pros
Learning how to deep clean your own rugs is a fantastic skill, but part of being a smart owner is knowing when to step aside. Pushing a DIY clean too far on the wrong rug can cause permanent, heartbreaking damage. Sometimes, calling a specialist is not just an option; it is the only one.
If you have a rug made from delicate fibers like silk or viscose, or if it is a priceless antique or a handmade Oriental piece, do not clean it yourself. These are not just floor coverings; they are investments. They often have unstable dyes and incredibly fragile weaves that can be instantly ruined by the wrong pH, too much water, or even the wrong brushing technique.
Knowing When You're Out of Your League
There are some messes that household tools just cannot handle. No amount of elbow grease will fix certain problems, and trying can often make them worse.
It is time to pick up the phone when you are dealing with:
- Serious Pet Problems: If a pet has had several accidents in the same spot, you can bet the urine has soaked deep into the rug's foundation. A surface clean will not cut it. You need a professional deep wash to truly flush out all the uric acid crystals.
- Deep, Ingrained Grime: Does your rug still look dingy or feel gritty even after you have given it a thorough vacuuming and cleaning? That is compacted soil deep in the fibers. Professionals have specialized machinery that can safely dislodge and remove it in a way home equipment cannot.
- Major Water Damage: After a pipe bursts or a flood, a rug needs immediate, expert intervention. A pro can get it dried quickly and properly to prevent mold, mildew, and structural rot that will destroy it from the inside out.
- Mystery Stains: If you have no idea what a stain is or your gentle attempts have only made it worse, stop. A specialist has the experience to identify the substance and use the right solvent to remove it without bleaching the color or damaging the fiber.
Knowing when to back away is just as important as knowing how to clean. For valuable, delicate, or heavily soiled rugs, professional cleaning is not an indulgence, it is essential maintenance.
The Professional Difference
There is a reason the professional cleaning market is booming, with North America making up about 31% of the global share in 2024. People are realizing that proper care protects the valuable things in their homes. You can dig deeper into the trends shaping the rug cleaning market to see why.
For these tough jobs, you need a team that knows what they are doing. At Rubber Ducky Rugs, our local specialists have seen it all. We understand https://rubberduckyrugs.com/the-truth-about-rug-cleaning/ and use controlled, time-tested methods to ensure every rug gets exactly the care it needs. With teams in cities from Phoenix to Philadelphia, we are here to provide the expert help your rug deserves when a DIY job is not enough. As we continue our nationwide expansion, more cities are being added every month.
Got Questions? We've Got Answers
Even the most thorough guide can leave you with a few lingering questions. It is only natural. Let's tackle some of the most common things people wonder about when they're deep cleaning their own area rugs.
How Often Should I Really Be Deep Cleaning This Thing?
Great question, and it really depends on your lifestyle. For a rug tucked away in a guest room or a home office that does not see much action, you can probably get away with a deep clean every 12 to 18 months.
But if you have a busy home with kids and pets, your high-traffic rugs in the living room or entryway are a different story. For those, you will want to aim for a deep cleaning every 6 to 12 months. Staying on top of it prevents dirt from getting ground deep into the fibers, which is what really wears a rug out over time.
Can I Just Use a Rental Rug Cleaning Machine?
We get this one a lot, and our answer is almost always a hard no. While you might get away with it on a super durable, low-pile synthetic rug, those rental machines are just too harsh for most area rugs.
We would never, ever use a rental machine on:
- Wool, silk, or delicate viscose rugs
- Any hand-knotted, vintage, or antique pieces
- Rugs with fringe or a fragile backing
The combination of high heat, aggressive rotating brushes, and intense suction is a recipe for disaster. You are risking permanent damage like fuzzy, distorted fibers, colors bleeding everywhere, and even shrinkage. It is a gamble that is just not worth the potential heartbreak.
My Rug Feels Stiff and Crunchy After I Cleaned It. What Happened?
That stiff feeling is the tell-tale sign of soap residue left behind in the fibers. It means the rug was not rinsed out completely.
Not only does it feel unpleasant, but that leftover soap is also sticky, acting like a magnet for fresh dirt. This is why a poorly rinsed rug seems to get dirty again almost overnight. Rinsing thoroughly until the water runs completely clear is the single most important step for getting that soft, clean feel back.
Is It a Bad Idea to Clean My Own Oriental Rug?
Yes, it is a very bad idea. Please do not try it. Valuable pieces like oriental, antique, or hand-knotted rugs are in a completely different league. They are often crafted with sensitive natural fibers and dyed with traditional vegetable dyes that can bleed or fade with the wrong cleaner or even just water that is too hot.
A simple DIY mistake can cause catastrophic, irreversible damage, ruining a beautiful and valuable heirloom. These rugs are investments and truly require the specialized touch of a professional rug cleaner who understands the chemistry and craftsmanship involved.
When a DIY job just will not cut it, it is time to call in the pros. The specialists at Rubber Ducky Rugs serve homeowners in major cities and local communities across the country, giving your valuable rugs the expert care they need to last a lifetime. Call, text, or book online for a professional cleaning. https://rubberduckyrugs.com
