
Before you even think about grabbing a bottle of cleaner, the single most important question to ask is: What is my rug made of?
This one detail changes everything. Using a cleaner meant for a tough synthetic rug on a delicate wool heirloom could be a disaster, leading to faded colors or damaged fibers. On the other hand, using a gentle wool cleaner on a synthetic rug might not do much at all. Getting this right is the foundation of a successful clean.
Matching Your Rug to the Right Cleaning Method
Think of it like this: you wouldn't cook a delicate fish on high heat, and you wouldn't try to slow-cook a thin steak. Rugs are the same. A durable, machine-made polypropylene rug can handle a deep, wet clean with a carpet cleaner, no problem. A hand-knotted silk rug, however, might need a much gentler approach, like a dry-compound clean or even professional care to avoid ruining it.
Taking a moment to figure out your rug's material and how it was made dictates every other choice you'll make. It’s the difference between a beautifully refreshed rug and a costly mistake.
This simple flowchart breaks down how we think about it professionally.
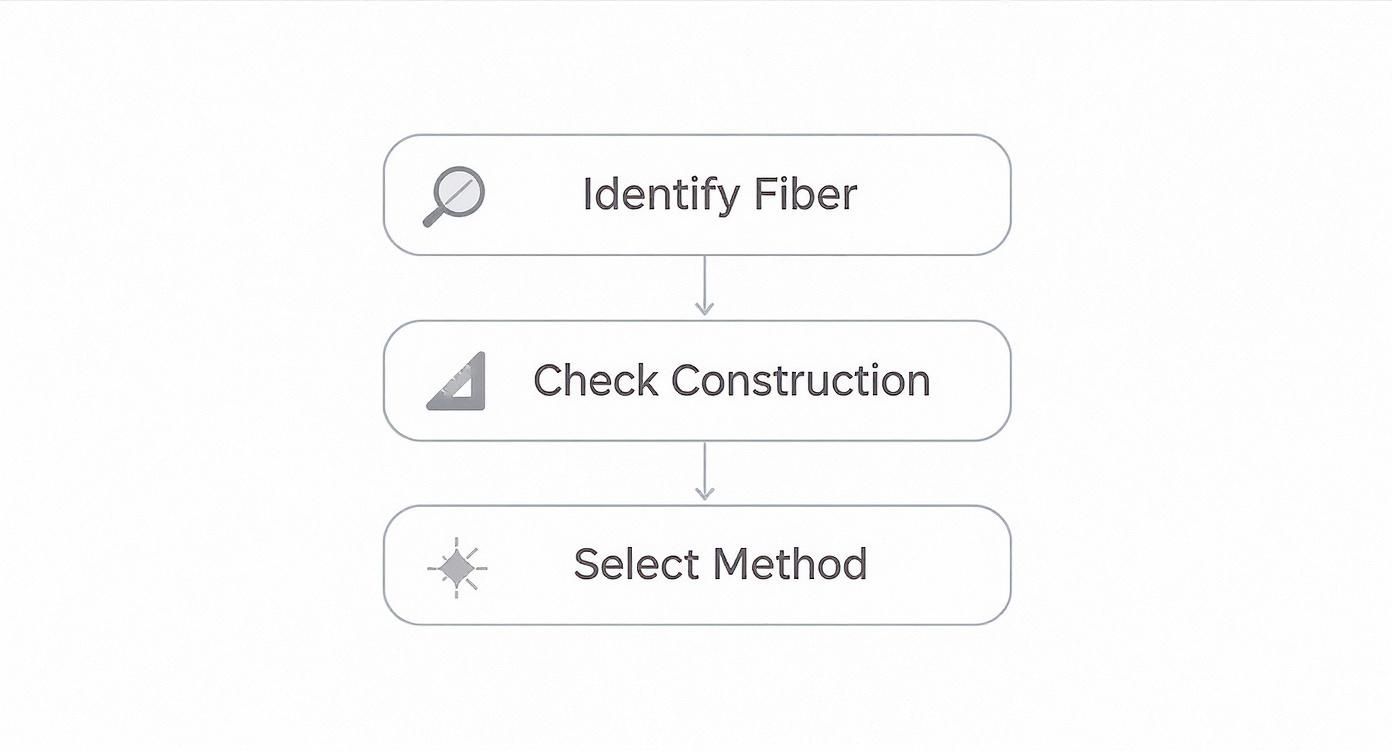
It’s really a process of elimination. You identify the fiber, check its construction, and then you can land on a safe and effective cleaning method.
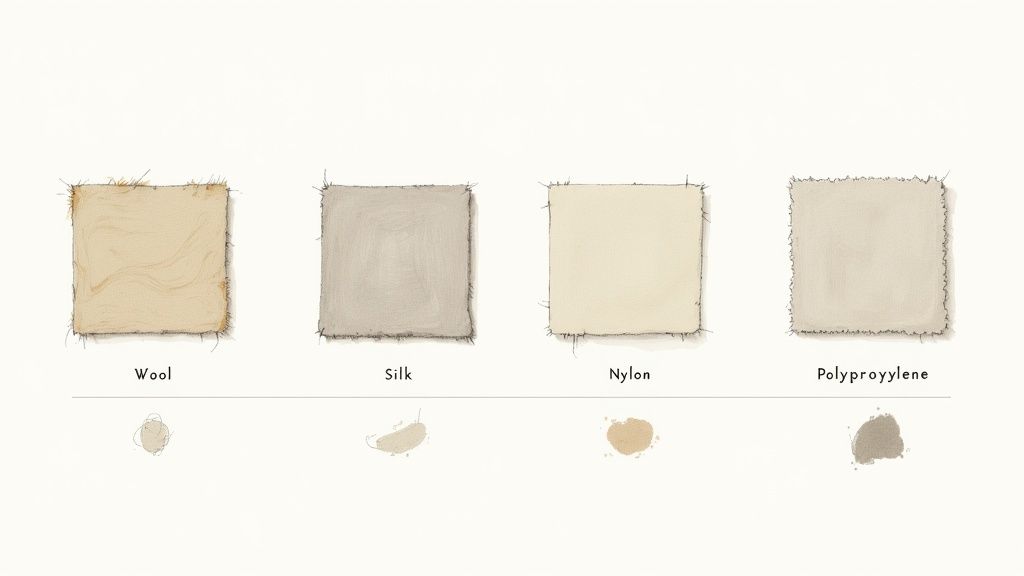
Distinguishing Natural From Synthetic Fibers
So, the first puzzle to solve is the fiber. Rugs fall into two main camps: natural or synthetic. Each has its own personality.
- Natural Fibers: Think wool, silk, cotton, and jute. These materials feel luxurious and are surprisingly durable, but they can be sensitive to too much water or harsh chemicals. Wool, for example, has natural lanolin that repels stains, but the wrong cleaner can strip it right out.
- Synthetic Fibers: This group includes materials like nylon, polypropylene (often called olefin), and polyester. They’re built to be stain- and moisture-resistant, which is why they’re so popular for high-traffic areas and busy homes. They can usually handle stronger cleaning solutions.
To figure out what you have, check for a label on the back first. If it’s missing, use your sense of touch. Wool often feels a bit coarse or springy, while silk is unmistakable—it's incredibly smooth and cool. Synthetics can sometimes feel slightly waxy or even a little plasticky.
To make it easier, here's a quick reference table we use to help homeowners identify their rugs and choose the right approach.
Rug Fiber Identification and Cleaning Approach
| Fiber Type | Key Characteristics | Recommended Cleaning Method | What to Avoid |
|---|---|---|---|
| Wool | Soft, springy, naturally stain-resistant, earthy smell when wet. | Gentle, pH-neutral cleaners; cool water; blotting (not rubbing). | Hot water, high-alkaline cleaners (ammonia, bleach), excessive soaking. |
| Silk | Very soft, smooth, high sheen, delicate feel, cool to the touch. | Professional cleaning is highly recommended; otherwise, very light misting and blotting with a dry cloth. | Water saturation, harsh chemicals, any type of friction or scrubbing. |
| Cotton | Soft, absorbent, feels like a t-shirt, prone to browning/yellowing. | Mild detergent with minimal water; spot cleaning; quick drying. | Over-wetting (can cause mildew), aggressive scrubbing, heat. |
| Jute/Sisal | Coarse, fibrous, natural tan/brown color, stiff texture. | Dry cleaning compounds only; immediate blotting of spills. | Water! It will cause browning, water stains, and fiber decay. |
| Nylon | Resilient, strong, can feel slightly coarse, holds its shape well. | Steam cleaning, hot water extraction, most commercial carpet cleaners. | Bleach-based products unless it is "solution-dyed" nylon. |
| Polypropylene (Olefin) | Waxy or oily feel, lightweight, highly stain-resistant (except for oil-based stains). | Hot water extraction, synthetic-safe cleaners. Colorfast, so it can handle stronger solutions. | Oil-based solvents, as they can bond with the fibers. |
| Polyester | Soft, can look and feel like wool, good color vibrancy. | Warm water extraction, gentle detergents. | High heat (can melt fibers), harsh agitation that can cause "pilling." |
This table is a great starting point, but always remember to spot-test any cleaning solution in an inconspicuous area first.
Why Rug Construction Matters
Next up is construction—how was the rug put together? This tells you how much agitation it can take. A tightly woven, hand-knotted rug is incredibly durable, while a tufted rug—where fibers are glued to a backing—is far more delicate. If you scrub a tufted rug too hard, you risk pulling the fibers right out of the adhesive.
A rug's construction is its blueprint for care. A machine-made rug is built for utility and can handle robust cleaning, whereas a hand-knotted piece is a work of art that requires a gentler touch to protect its intricate structure.
Understanding these basics gives you the confidence to choose the right path, whether you're cleaning up a quick spill or doing a full deep clean. Of course, for valuable or antique rugs, calling a professional is always the safest bet.
There's a reason the professional cleaning industry is growing so fast. The global carpet and upholstery cleaning market was valued at USD 55.16 billion in 2022 and is expected to hit USD 83.5 billion by 2030. People are realizing that proper care preserves their investment.
Ultimately, whether you decide to DIY it or call in experts like the ones for professional rug cleaning in Birmingham, Alabama, starting with proper identification is non-negotiable. It's truly the difference between a refreshed rug and a ruined one.
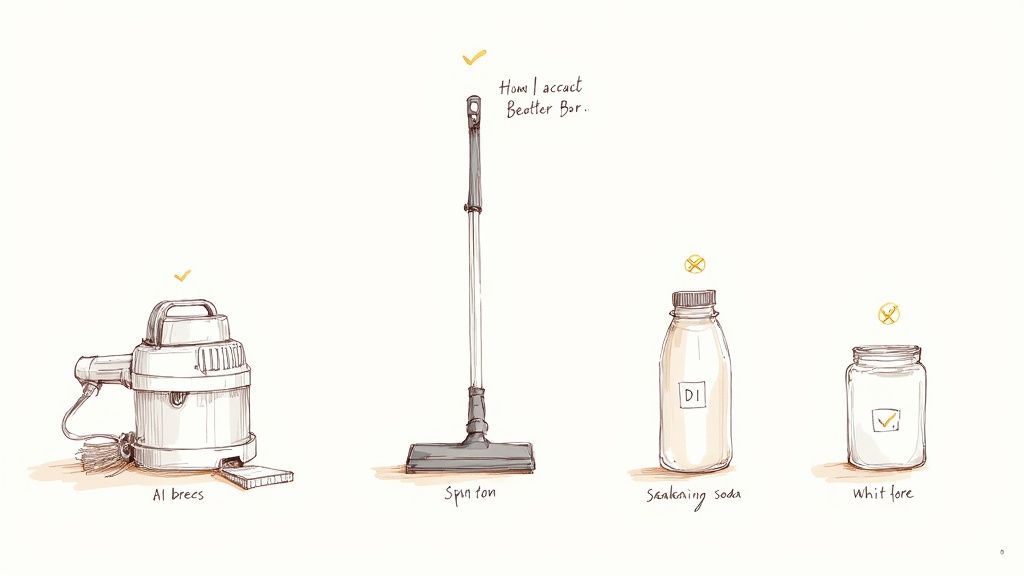
Assembling Your Rug Cleaning Toolkit
Before you even think about tackling a spill, let's talk about tools. The difference between a frustrating chore and a successful cleaning session almost always comes down to having the right supplies ready to go. This isn’t just a shopping list—it's your strategy for protecting your rug's fibers and getting a professional-level clean at home.
Your most valuable player here is a good vacuum cleaner with adjustable settings. For durable synthetic rugs, a vacuum with an aggressive beater bar is fantastic for digging out that deep-seated grit. But use that same setting on a delicate wool or silk rug, and you risk snagging, fraying, or literally breaking the fibers. Having the ability to turn off the beater bar or raise the vacuum’s height isn't just a nice feature; it's non-negotiable for keeping your rugs safe.
Essential Cleaning Tools and Supplies
Beyond a versatile vacuum, a few other items are absolute must-haves. Think of this as the foundational kit that will get you through almost any rug cleaning job.
- Soft-Bristle Brushes: Stay far away from stiff plastic or wire. A brush with soft, natural bristles is what you need to gently work cleaning solutions into the pile without causing that dreaded fuzzing or damage.
- White Microfiber Cloths: Always use white cloths. The last thing you want is to discover your cleaning cloth has transferred dye onto your light-colored rug. Microfiber is also incredibly absorbent, making it perfect for blotting spills and lifting away grime.
- Spray Bottle: A simple spray bottle gives you control. It lets you apply cleaners evenly and sparingly, which is crucial for preventing the over-saturation that leads to mildew and fiber damage.
- Buckets: You need at least two. One for your cleaning solution and a separate one for clean rinse water. This simple step keeps you from dipping your cloth back into dirty water and reapplying the grime you just lifted.
Having separate buckets for washing and rinsing is a simple but critical step. It ensures you’re truly removing dirt from the rug, not just spreading it around in a grimy solution.
Choosing Your Cleaning Solution
The cleaner you use is just as important as the tools you scrub with. While there are some great commercial products out there, you can make incredibly effective solutions from things you probably already have in your pantry.
A fantastic DIY cleaner for many rug types is a simple mix of equal parts white vinegar and cool water. The vinegar's acidity is great for breaking down dirt and neutralizing odors without relying on harsh chemicals. For a tougher spot, try making a paste from baking soda and a little water. Just work it into the stain, let it dry completely, and vacuum it up. No matter what, always test your solution on a hidden spot first.
If you prefer a commercial cleaner, read the label like a hawk. You're looking for products that are pH-neutral and made specifically for your rug’s material (like "wool-safe"). Avoid anything with harsh ingredients like bleach or ammonia—they can cause permanent color loss and fiber damage, especially on natural materials like wool or cotton.
Everyday Maintenance and Spot Cleaning Secrets
The secret to a great-looking rug isn't some marathon cleaning session once a year. It’s the little things you do every week that really count. Think of it this way: a deep clean is the big reset button, but your day-to-day habits are what stop dirt from getting comfortable and moving in permanently. Honestly, being proactive saves you a ton of work down the road.
A simple routine makes all the difference, stopping dirt in its tracks before it gets ground deep into the pile.
This kind of regular care doesn't just keep your rug looking good—it actually extends its life by preventing all that embedded grit from wearing down the fibers over time.
Your Weekly and Monthly Rug Care Routine
A little bit of consistency is your best friend here. The goal is to build simple habits that don't feel like a massive chore but deliver huge payoffs for your rug's health and longevity.
Here’s a practical schedule that actually works:
- Once a Week: Give your rug a thorough vacuum. Don't just go in one direction; pass over it north-to-south, then east-to-west to lift dirt from every angle of the fiber. If your rug doesn't have a fringe, make sure to vacuum right over the edges where dust loves to collect.
- Twice a Week (for High-Traffic Areas): Rugs in entryways, hallways, or the main living room get a lot more action. A quick mid-week vacuum keeps tracked-in dirt from getting ground into the pile and spread through the house.
- Once a Month: If the size allows, take your rug outside for a good, old-fashioned shake. This is fantastic for dislodging the heavy, deep-down grit that even the best vacuums can't always grab. After that, flip it over and vacuum the back—this little trick helps loosen even more of that stubborn, embedded dirt.
The golden rule of vacuuming is simple: slow down. Racing across the surface only skims the top layer of dust. A slow, deliberate pace gives the vacuum’s suction and beater bar time to actually agitate the fibers and pull out the grit that’s hiding deep inside.
The Art of a Successful Spot Clean
Spills are going to happen. It's just a fact of life. But stains? Those are optional. How you react in those first few moments makes all the difference. Panicked scrubbing is the absolute worst thing you can do—it just shoves the spill deeper and can permanently damage the rug fibers.
Remember this mantra: blot, don't rub. Grab a clean, white cloth (so you can see the stain transferring) and press down firmly. Your goal is to absorb, not spread. Work from the outside of the spill toward the center. Keep folding the cloth to a clean section until you're not lifting any more of the spill.
If you're dealing with something solid or semi-solid, like mud or a dropped bit of food, gently scrape off the excess with a dull knife or a spoon first. Then you can start blotting. Trust me, acting fast is your biggest advantage.
Battle-Tested DIY Stain Solutions
You don't always need to reach for a heavy-duty commercial cleaner. Some of the best solutions are probably already in your pantry. Just one word of caution: always, always test any new solution on a small, hidden spot first (like under a sofa) to make sure it doesn't mess with your rug's color.
Here are a few go-to recipes that have saved many rugs:
- For Coffee or Red Wine: After you’ve blotted up as much as you can, mix a solution of one part white vinegar to two parts water. Lightly mist it onto the stain, let it sit for about 5-10 minutes, then get back to blotting with a clean, dry cloth.
- For Pet Accidents: Once you’ve blotted the area dry, that same vinegar-and-water solution is great for neutralizing the odor. If the smell is particularly stubborn, sprinkle a generous amount of baking soda over the spot after cleaning. Let it sit for several hours (or even overnight) to absorb the odor, then vacuum it up completely.
- For Greasy or Oily Stains: This is where cornstarch or baking soda really shines. Sprinkle it directly onto the spot to absorb the oil. Let it sit for at least an hour, then vacuum it up. You might need to repeat this before you treat any leftover discoloration.
It's clear homeowners are serious about keeping their rugs clean. The global market for carpet cleaners, including specialized products and machines, was valued at USD 663.8 million in 2024 and is on track to hit over USD 1.1 billion by 2033. This isn't just about looks; it reflects a huge demand for methods that clean effectively while protecting the investment we've made in our homes. You can read more about these carpet cleaner market trends at Grand View Research to see just how much people value keeping their rugs in pristine condition.
How to Deep Clean Your Rug Like a Pro
When the weekly vacuuming just isn't cutting it anymore, it’s time for a deep clean. This is the only way to truly flush out the months of embedded dirt, allergens, and grime that have flattened your rug’s fibers and dulled its color. Think of it as a total reset.
We'll walk through two solid DIY methods: a gentle hand-wash that’s perfect for more delicate pieces and a machine-powered approach for those tough synthetic rugs that can handle it.
But before you get a single drop of water on that rug, you absolutely have to get the dry dust out. If you skip this, you’re just making mud. Take your rug outside, hang it over a sturdy fence or clothesline, and beat it with the flat side of a broom. You’ll be shocked at what comes out.
Next up is the colorfastness test. Find a small, hidden spot—a back corner works well—and dab a little of your cleaning solution on it. Wait a minute, then press a clean white cloth firmly against the spot. If any color bleeds onto the cloth, stop. Your rug isn't colorfast, and wet cleaning will create a mess.
The Gentle Hand-Washing Method
This is my go-to for anything sensitive, like wool or hand-knotted rugs. It gives you total control, so you don't risk oversaturating the fibers or causing damage. You’ll need a clean, flat surface (a driveway or patio is perfect), a soft-bristle brush, and a gentle rug shampoo. You can even make your own with cool water and a few drops of a pH-neutral soap.
First, lay the rug flat and give it a light rinse with a hose—no high-pressure jets. Mix your cleaning solution in a bucket, dip your brush, and gently work it into the pile. Always scrub with the direction of the fibers, never against them.
Pro Tip: Tackle the rug in small, manageable sections. This keeps the soap from drying out before you have a chance to rinse it away and ensures you don't miss any spots.
Once you’re done shampooing, rinsing is key. You have to get every last bit of soap out, otherwise you'll be left with a sticky residue that acts like a dirt magnet. Rinse with the hose until the water running off the rug is perfectly clear. Then, use the back of your broom or a floor squeegee to gently push the excess water out, always moving in the direction of the pile.
Using a Carpet Cleaning Machine
For those durable synthetic rugs (think polypropylene or nylon), renting a carpet cleaning machine can give you that professional-grade deep clean. These machines, often called hot water extractors, are serious business. They inject hot water and a cleaning solution deep into the rug and immediately pull the dirty water right back out.
This method is incredibly effective. It's the same technology the pros use, which is a cornerstone of an industry valued at USD 1.10 billion in 2024. People want a truly deep clean that gets rid of allergens and ground-in dirt. You can dig into more data on the global carpet cleaner market at Grand View Research to see just how big the demand is.
If you go the rental route, here’s how to get it right:
- Stick to the Recommended Solution: Don't get creative here. Only use the cleaning solution made for the machine and your rug type. Household soaps will foam up and can wreck the extractor.
- Don't Drown Your Rug: Make one slow pass forward while the machine sprays the solution, then make another slow pass backward to suck up the water. Overlap your strokes slightly for even coverage.
- Do a Final Rinse-Only Pass: This is the pro step most people skip. Empty the machine, fill the tank with plain, clean water, and go over the entire rug one last time. This rinses out any lingering detergent.
Whether you hand-wash or use a machine, the goal is the same: flush out the deep-down soil and leave the fibers fresh and residue-free. Of course, some jobs are just too big or too delicate for a DIY approach. If you're considering calling in the experts, our guide on professional rug cleaning in Birmingham, AL can give you a better idea of what to expect. Matching the right cleaning method to your specific rug is what separates a great result from a costly mistake.
That Critical Final Step: Drying and Fluffing
You’ve done the hard work—the scrubbing, the rinsing, the stain-fighting—but don't celebrate just yet. This last part of the process is where many DIY rug cleanings go completely wrong.
How you dry your rug determines whether you end up with a fresh, revitalized masterpiece or a damp, smelly problem. In my experience, improper drying is the number one cause of mold, mildew, and that stubborn musty odor that just won't quit.
The worst thing you can possibly do is lay a damp rug flat on the floor or sling it over a single clothesline. This traps moisture deep in the foundation, slows drying to a crawl, and basically rolls out the welcome mat for mildew. Even when the top feels dry, the backing can stay wet for days, risking damage to both your rug and the floor underneath.
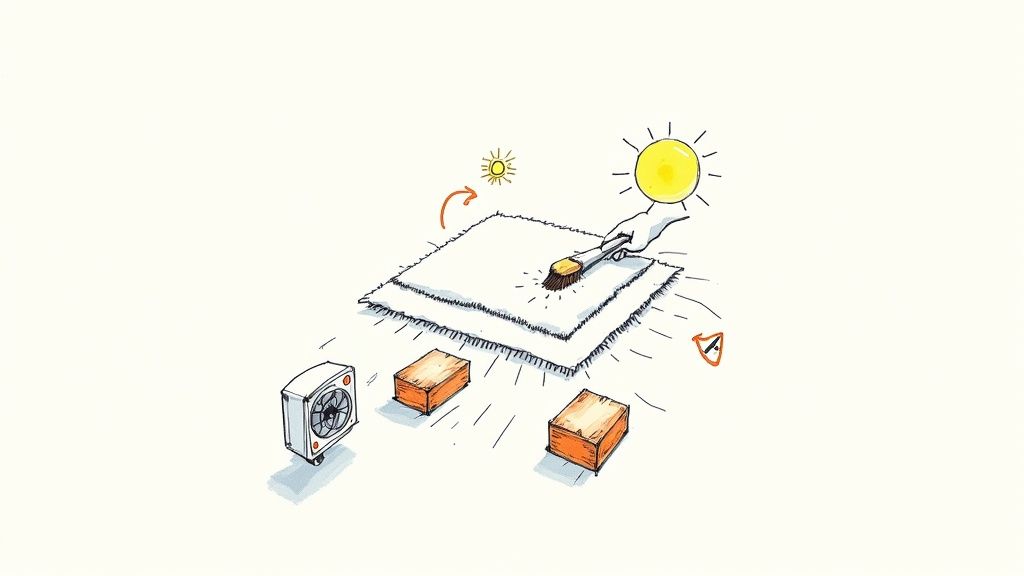
Creating the Perfect Drying Environment
The secret to success is all about airflow. You need air moving consistently across every single part of the rug—top, bottom, and all the fibers in between.
First, get it off the ground. You can drape it over a few sturdy patio chairs, a pair of sawhorses, or even a dedicated drying rack. The goal is to create a generous air gap underneath, allowing the front and back to dry at the same time.
Want to speed things up, especially if you live in a humid area? Time to bring in some backup.
- Fans are your best friend. Position one or two box fans so they blow air across the rug's surface, not directly down onto it. This creates a wicking effect that pulls moisture away much faster.
- A dehumidifier is a game-changer. If you're drying indoors, stick a dehumidifier in the room. It will literally pull moisture right out of the air, creating a much drier environment that helps the rug release its moisture.
A word of caution: Many people think blasting a rug with direct, hot sunlight is a great shortcut. While it dries fast, the intense UV rays can fade vibrant colors and make natural fibers like wool brittle and weak. Bright, indirect light is always the safer bet.
Restoring That Soft, Fluffy Pile
After hours of drying, your rug will be clean, but it might also feel a little stiff or compacted. The final touch—the one that separates an okay job from a great one—is fluffing the pile to bring back that original soft, plush texture.
Once you are 100% sure the rug is bone dry (seriously, check the thickest parts and the backing), it's time to bring those fibers back to life.
- Brush It Out: For shag, frieze, or other high-pile rugs, grab a soft-bristled brush or a specialty rug rake. Gently brush the fibers, following their natural direction, to lift and separate them. You'll be amazed at the difference this makes.
- Vacuum to Perfection: The last step is one final, slow pass with your vacuum cleaner. If you can, use a suction-only setting or lift the beater bar to its highest position. This grooms the pile, making it look uniform and professionally finished.
This careful attention to drying and fluffing is what truly ensures your rug doesn't just look clean—it looks and feels completely restored.
When to Call in a Professional Rug Cleaner
While a good DIY cleaning is perfect for routine maintenance and small spills, there are times when calling in a pro is the smartest move you can make. Knowing the difference between a simple cleanup and a potential disaster is the key to protecting your rug's value and lifespan.
Sometimes, the best way to clean a rug is to simply step back and let an expert handle it.
Think about that antique Persian rug you inherited or a delicate silk piece. These aren't just floor coverings; they're investments. The risk of using a solution with the wrong pH or accidentally causing the dyes to bleed is just too high for a weekend project. Professionals have seen it all and have the right equipment and know-how for every type of fiber.
Situations That Demand an Expert
Certain problems are immediate red flags. If you're dealing with any of these, don't hesitate—pick up the phone.
- Extensive Water Damage: If your rug got soaked from a flood or a serious leak, the clock is ticking. Professionals use industrial-strength water extraction tools and controlled drying rooms to prevent mold, mildew, and foundation rot. These are things that household fans and shop-vacs just can't handle.
- Deep-Set, Stubborn Stains: You've tried every trick in the book for that old wine spill or pet stain, but a faint outline still haunts you. Experts have access to professional-grade solvents and use techniques like hot water extraction to break down stains that have chemically bonded to the fibers.
- Valuable or Antique Rugs: Hand-knotted, Oriental, or other heirloom rugs need a gentle, specific approach. A pro will likely give it a full immersion wash in a controlled facility—a process that is impossible (and risky) to replicate at home.
A reputable professional won't just start blasting your rug with chemicals. They'll inspect it first. This is their diagnostic step, where they identify the fiber type, test the dyes for stability, and map out a cleaning strategy that gets results without causing any harm.
Of course, choosing the right service is everything. You'll want to find a company with a solid local reputation and plenty of positive reviews. A great service, like the one for Rubber Ducky rug cleaning in Birmingham, will be completely transparent about their process, from the first look to the final delivery.
This ensures your rug gets the specialized care it needs, bringing it back to life and protecting it for years to come.
Your Top Rug Cleaning Questions, Answered
Even with a solid plan, you're bound to have questions. It happens to everyone. Here are some quick, no-nonsense answers to the questions we get asked all the time.
How Often Should I Really Deep Clean My Rug?
This is a great question, and the honest answer is: it depends entirely on your lifestyle. For an average household, a professional deep cleaning once every 12 to 18 months is a solid baseline. That's usually frequent enough to pull out the deep-down grit and allergens that your vacuum can't touch, which is key to making your rug last longer.
But life isn't always average, is it? If you've got pets, kids, or your rug is in a high-traffic spot like the entryway or family room, you’ll want to shorten that timeframe. Think about a deep clean every 6 to 9 months. The trick is to clean it before it looks dirty—by the time you see the grime, it's already settled deep into the fibers.
Can I Use a Carpet Cleaner on My Area Rug?
This is a big one, and we get it a lot. The answer is a firm "maybe." Most modern synthetic rugs—think polypropylene or nylon—are tough enough to handle a standard carpet cleaning machine. They're built for it, with durable fibers and colorfast dyes.
But please, never use a standard carpet cleaner on delicate natural fibers like wool, silk, or jute. The high heat, excess water, and aggressive brushes are a recipe for disaster. You're risking irreversible damage like color bleeding, shrinkage, and warped fibers. For those special rugs, it's gentle hand-washing or a professional's touch, period.
What's the Best Way to Get Rid of Pet Odors for Good?
Ah, the dreaded pet odor. It’s so stubborn because urine contains uric acid crystals that latch onto rug fibers and the backing, re-releasing that smell every time there's a little humidity in the air. The goal isn't to cover it up; it's to destroy it at the source.
For a fresh accident, blot, blot, blot. Then, reach for an enzymatic cleaner. These products are specifically made for pet messes and contain active enzymes that literally break down and consume the odor-causing bacteria. They don't just mask the smell—they eliminate it.
If you're more of a DIY person, a solution of equal parts white vinegar and water can work wonders to neutralize the ammonia smell initially. After you’ve blotted the area dry, pile a thick layer of baking soda over the spot. Let it sit overnight to soak up any leftover moisture and odor, then vacuum it up completely the next day.
Ready to give your rugs a truly deep, professional clean without any of the guesswork? The team at Rubber Ducky Rug Cleaning uses specialized equipment and proven techniques to safely lift out dirt, stains, and odors, restoring your rug's original beauty. Learn more about our services and schedule your pickup today!